Friday 28 December 2012

Stuff

Hope everyone had a good holiday! I haven't taken photos or blogged in far too long. Here's a little Sylvanian pic:

Three Little Pigs

I've been working on a Vinyl Scratch custom for my husband. It was mean to be for Christmas, but I couldn't get it done on time. So, it'll be for his birthday on New Year's Eve. :) Maybe I should have chosen to do a Pinkamena for Christmas instead, might have been easier than Vinyl's hair.

It's nowhere near as nice as Otaku Squirrel's customs, but I don't think it's coming along too badly.

Vinyl Scratch custom WIP

Saturday 13 October 2012

Not dead, just a hiatus

Hi! Just wanted my readers to know that his blog is not dead, it's just on a hiatus until mid-December due to me taking up a new job. I won't have time for very much but the job for the next 10 weeks.

Friday 14 September 2012

Ducks

I've been pretty bad at updating this blog lately. It's not dead, I just haven't really had much to say. Recently I got the two SF duck families that I've been wanting for a while now; the Waddingtons and the Puddlefords. SF ducks are so cute. See:


Quack!

Lookit all the widdle ducklings! SF ducklings are so cute, but they are not very poseable at all. Only their heads turn.


Sunday 8 July 2012

Grand Mansion update

Thought I would update the progress on the Grand Mansion. I keep thinking that I would finish soon, but there's always another little thing that needs to be done, heh.

Front

Here's the repainted front door. I think the it needs a door knocker or something, don't you?


Living room

This is the living room with a little printed rug. I looked for dollhouse rugs on ebay and I realised that most of the cheaper options were actually too big. Printing rugs is much cheaper and you can resize them to fit! There's at least one on every floor now. I'm also wondering if I should paint some gold edging on this side of the door too.


Kitchen/ dining room
 Kitchen and dining room - The original floor is a pale colour with wood effects. Since I like darker floors (and I'd accidentally ripped up some of the floor when I was masking it earlier - oops) I found a dark wood texture and printed it out. The buildings are too wide for a single piece of A4 paper to completely cover so I printed out another one. The result was a very visible (to picky old me) seam that bothered me a lot. In the end I used some wood effect contact paper used to line shelves for the flooring. Much better! The contact paper is pasted onto some cardstock so I can remove the paper easily in the future if I ever want to change the flooring.


Bedroom
Bedroom - The wallpaper was not supposed to have that pinkish purple tinge. My printer was running out of yellow toner, so for a while everything I printed had this purple tinge. I thought that for a bedroom, the wallpaper looked all right with the pink-purple, so I left it.


Unfinished bathroom Bathroom - As yet unfinished. I ran out of steam at this point. ^^;;


Photobucket
I also found some lamps to use for the front of the house. I think these were originally from the river boat or something. These resemble the original lamps enough that I'm satisfied. I'm just unsure whether I should leave them gold or spray them black like in the original version. The don't really fit into the tabs on the pillars, unfortunately. They keep falling off. I think that a bit of blu tac will solve the problem.


Currently the finished floors are fully furnished, I just need to reflock some chairs, find some picture frames to go on the walls, do up a few simple curtains and then I'll take some pics. Or should I just take pics and post them up now since I probably won't be working on the building for a few more weeks? I need to finish the little conservatory on the side too.

---

Recently, I've been watching Avatar: The Last Airbender. I love Aang, he's totes adorbs, guys. I never liked his character design until I actually watched the series. He's sooo cute I just want to squish his cheeks. Or ride Omashu's postal system with him. Maybe not, I think I would die.

I've just finished season 2 and things have definitely become more serious this round. Not as much random adventure type fillers this time.

Thursday 19 April 2012

Flocking Sylvanians

After flocking that chair cushion, I found a little bootlegged sheep and thought it would be a great figure to experiment flocking on. I bought some flocking powder from BNA Model World ( I just chose the cheapest ones, the ones from The Parts Box) and used this tutorial. Flocking a figurine is a lot more time consuming and messy than flocking a flat cushion. Very messy. Anyway, I decided to create a little black sheep baby.
The bootlegged figurine. It's been lying forgotten in an unused handbag for about a year.

Bootleg Sylvanian sheep

I removed the eyes and all the flocking with something called Orange Power. It's a glue remover, and it was very helpful. I'd been trying to scrape off the flocking with my fingernails and warm water before that, and Orange Power makes the glue just slide off.

Flocking and eyes removed

I painted the sheep grey. In retrospect, I should have painted it black, but I didn't want the grey spot to end up looking too dark. Now I think black would have given a better effect.

Painted grey

And several days of glue applying, drying and getting dust everywhere, and probably breathing inb more flocking than is good for me (seriously, wear a mask folks) she's done! I think I will call her Emily. It's kind of close to Emma, and I want them to be cousins or something, heh.

Little Black Sheep

I want to make a dress for her in the future, but this one will do for now. There are a few shiny spots on her leg and arm where I applied too much glue, but luckily with the dress on it's hard to see. I also should have painted on her nose instead of painting the flocking, I think it would have looked better. Also I'm just guessing at where the nose should be now as the flocking obscured so much of the fine detail.

Here's a picture comparing her to an original Sylvanian sheep baby.

Black sheep and original Sylvanian sheep

The original has a fatter, cuter head mold IMHO. The bootleg has a head that looks weird and skinny. I'm tempted to get a standing baby to flock so I can have a black sheep baby with a fat head. Not anytime soon though, I'm pretty sick of flocking for now.

Tuesday 17 April 2012

Grand Mansion and zombie animals progress update

I've given my little zombies limbs and attached their accessories to them.

Zombie animals WIP

All except the green bear have accessories. The blue bunny is actually hiding a knife behind his back. All they need now is a coat of paint--except for the pink cat, he needs a tail and some bandages. I broke one of the petals off the yellow bear when I was putting her limbs on, but the good thing about zombies is that it doesn't matter. :p

The stone effect paint has finally dried and here's how the mansion looks like mostly put together:

Grand Mansion WIP
I haven't reattached some of the doors yet.

I still need to correct all these mistakes I made while painting the building. *sigh* Carelessness makes more work! Here are just some of the things I need to fix, and there are two or three spots like this on every floor of the building.

Some grey smears:

Grand Mansion mistakes 1

Spots where I've removed the grey smears, but unfortunately had to take the nicely painted white with it.


Grand Mansion mistakes 2

That's all the updates I have for now. I hope to post about another project I've been doing, hopefully by tomorrow; but more realistically, it'll probably happen the day after.

Wednesday 11 April 2012

Back again! With updates on all my projects

Back from the long hiatus! Now that it's school holidays here in SA, I have more time and energy for crafts and blogging. :) I still haven't been getting many teaching jobs, but things picked up a little at the end of term. All I can do now is continue volunteering at different schools everyday to keep myself visible and be ready to jump on any opportunities I see. I hope next term will be better. I really want to land a contract to teach for more than one day at a time. I'm also thinking of taking up a casual cleaning job on the weekend to bring in more money.

Anyway, on to the projects! I've been planning to open up an Etsy shop selling little critters like these guys:

zombie phone charms

They are about 4 cm tall and were originally meant to be phone charms, but after asking at the Regretsy forums, turning them into necklaces seem to be the more popular choice. I'm working on five more now since the three in the picture are all spoken for and I'm still waiting for my necklace making supplies to arrive.

WIP zombies

I've reworked the brain design, the brain the little pink bear is holding didn't turn out quite the way I had imagined it. I was trying to go for a cute stylised brain, but oh, well... I'm still experimenting with ways to make the claws more durable, but I don't think the whole 'coat little wires with liquid clay' thing is going to work out. It breaks off and wire claws are pointy. I'm probably not going to end up listing the puppy for sale because he's the one I used to experiment metal claws on. All the others will have straight up polymer clay claws. I'm also making these ones to be able to stand up on their own, unlike the first three--I had to use blu tak for them.

I've also been experimenting with flocking powder. I was sold some vintage Sylvanian chairs and told that they were in 'excellent' condition. They were NOT. Flocking was rubbing off in places and it looked old to boot, so I decided to buy some red flocking and try reflocking the chairs myself.


Flocking experiment

The top cushion is the one I reflocked, and the bottom cushion is still in the condition it came in. I'm pretty pleased with the results and I'll take a photo once I've finished reflocking everything. (Again, one of those things I keep meaning to do but I keep getting sidetracked) I'm also going to try reflocking a little fake sheep figurine I have; just waiting for the supplies to arrive.

An update on the Willow Hall I was painting:


WIP bootleg Willow Hall

Yeah, nothing but some of the floor done. I've hit a stone wall with this project. Put together, the white highlighted areas are too plain and I haven't been able to figure out what other colours would go well with the darkish green and the white. I've tried reddish brown and dark green, but it doesn't look very good to me on this building. The green colour of the main body is supposed to be lighter, but the paint darkened after drying. I had some highlights planned for a lighter green body colour but they don't really work with the current colour. I think I will try some light green highlights and maybe a few darker green ones.

My main project right now is repainting this baby right here:

Sylvanian Grand Mansion

I found this awesome vintage Sylvanian Families Grand Mansion at a dollshouse store near Adelaide. I was floored at finding this building there; I see them pop up all the time on Ebay UK, but never in Australia. It's a building I never thought I'd ever own because of what it would cost to ship from overseas. I was so excited I'm sure I overpaid for this thing, especially in this condition.

As you can see, the white parts are significantly yellowed and there are a lot of parts missing. Most of the major parts are there, it's mostly the small fiddly bits that are gone like the lamps, foot scraper, flower boxes, clothesline, part of the conservatory railing, the canopy, etc. The only missing parts I really want are the front door lamps, the missing railing and the little sticking out bit on the conservatory where you can hang a flower pot from. Mostly the lamps. I saw some of these parts on Ebay a couple of months back but I was too stingy to fork out for the more expensive shipping method the seller was using. I kinda regret that now because I haven't seen any of these parts turn up lately!

Another awesome thing about this building is that all the floors are just stacked one on top of the other, and are removable. Makes it easier to paint and to take photos in.

I started out by repainting the roof.

Grand Mansion roof repainted

In this picture the windows haven't been painted yet. They look so yellow next to all the newly painted white parts! I like the details on the front of this building, looks so cool.

With windows done:

Grand Mansion roof repainted 2

I keep forgetting to paint the chimney. I also need to build a new trapdoor for the roof, both the trapdoor and the ladder leading up to it are missing. Ladders I don't mind so much, but one cannot have a large gaping hole in the roof!

WIP spraying photo!

WIP grand mansion

I used a stone effect texture spray for the main body and a gray primer as the undercoat. I think I should have used a white because the colours came out a lot darker than I wanted. Oh well, too late now.

And I've been careless because this happened:

Masking errors

The masking tape and the areas I tapped off are pretty similar in colour so I missed a few spots... :p

 Here's how it looks like with all the masking tape taken off:


WIP grand mansion with body

The red door is very striking, but it's not going to be permanent because I don't like it. I'm thinking of painting it black with some golden highlights instead.

Texture paint is very messy and sometimes it clumps up and makes big blobs. That's probably the result of my crappy spraying skills though. It also tends to obscure some of the finer details. It also goes everywhere when you remove the masking. I might just try using normal sprays or acrylics next time I need a stone effect.

That's it for now, I'm hoping to finish the Grand Mansion before the holidays are over!

Sunday 12 February 2012

Super sekrit ponee projekt

Over the past few weeks I've been working on a very different project than usual. A little while ago I convinced my husband to watch some of the My Little Pony: Friendship is Magic episodes with me and since then he's turned into a bigger MLP fan than I am. I'm not a very big fan to tell the truth, I just think the ponies are cute and entertaining if you want something cheerful and simple to watch. My husband watches it for the same reasons, but he seems to like it more. Anyway, we've seen some of the MLP dolls and my husband's been pretty disappointed by the overall look of the Rainbow Dash toy.

This:
Photobucket

Doesn't really look like this:


Photobucket

Hasbro's toy has a milder, sweeter look to it, more suited to a pretty princess and the Rainbow Dash of the series is a rough, high flying tomboy.

I decided that I would create a more accurate looking Rainbow Dash and surprise my husband with it for Valentine's. We don't really celebrate Valentine's, I'm just using it as an excuse to give him a present. :p

I suck at styling doll hair so I decided to yank out all of my Rainbow Dash's hair and give her a molded hair piece instead. I found some awesome molded hair kits from OtakuSquirrel on deviant art and I was tempted to order one. I decided to try my had at making one of my own and I used his WIP pictures a lot for reference. I think that OtakuSquirrel's hair mods are a lot better than mine, but I'm pleased with how the hair turned out in the end.

WIP picture.

super sekrit ponee projekt

I molded the hair out of some beige clay I had lying around (couldn't find my non-Fimo Soft white clay). I didn't want to risk melting the pony in the oven so I boiled the pony's head with the hair on it. I baked the hairpiece in the oven after it had hardened in the  boiling water.

Over the next couple of weeks I sanded and painted the pony while my husband was asleep. He goes to bed earlier than I do because he has to get up for work really early in the morning. I redid the face as well as painted another cutie mark on her left flank (what's up with Hasbro giving ponies a cutie mark only on one side now?). I had a heart attack moment when I was halfway through painting the cutie mark because it was the WRONG WAY AROUND. I then discovered that the mark I had been painting was in fact the right way around according to the show, and that the default mark on the toy was actually the one that was the wrong way around...

Super sekrit ponee projekt update


I think the grin kinda makes her look evil. Not entirely satisfied, but it'll do.The carved lines are so wonky. That's what I get for using a piece of wire to do the grooves instead of a proper tool. All that's left to do now is to touch up those white spots and glue all the pieces together. I'm uncertain of what to use, super glue? A hot glue gun? And I'll also need to keep my mouth shut till Valentine's. I've been so close to spilling the beans several times now! I'm sure my husband suspects something from all the Rainbow Dash pictures on my computer and all that talk about a secret project that I'm working on but won't show him. He commented last night that he thought I was a bigger pony fan than him because of all the pony stuff I'd been looking at. It's research! But those pony toys are starting to look really cute and ripe for customising...

Thursday 19 January 2012

Completed Sylvanian Post Office (finally!) and other misc stuff

Wow, it's been a really long time since I updated. I've been in a funk lately, I have no motivation to get anything done. Not having regular hours and feeling lonely can get you down. Oh well, we'll see what the new year brings, I've applied to a few places and we'll see if I land anything more permanent. At the moment I'm not starving or unable to pay bills, and can afford luxuries, so I'm really in a much, much better place than a lot of people. I should be grateful.

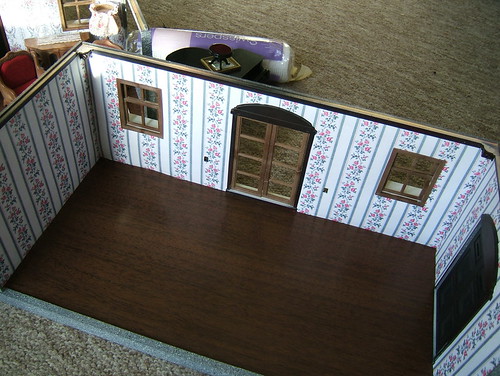
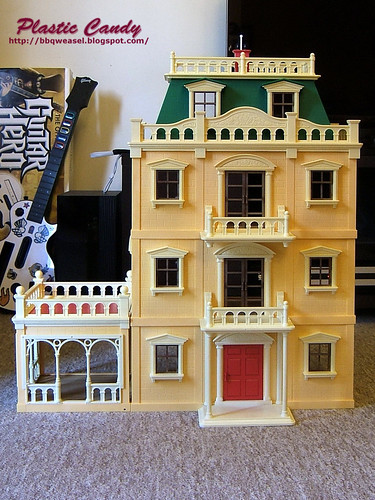
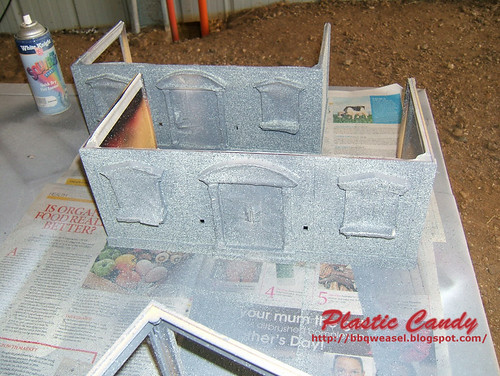
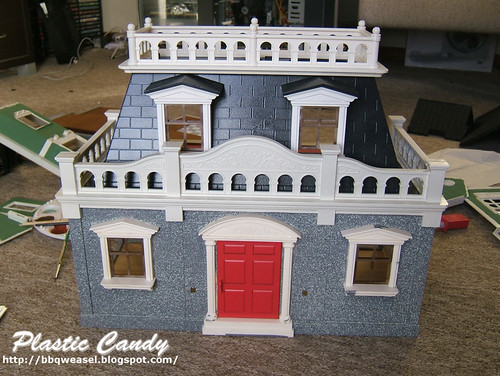
Anyway, let's get on to the post office update! Yes, after so long, I've finally completed refurbishing the building. Pictures are worth a thousand words, so here they are. Apologies for the crappy pics and lighting.


Post office complete

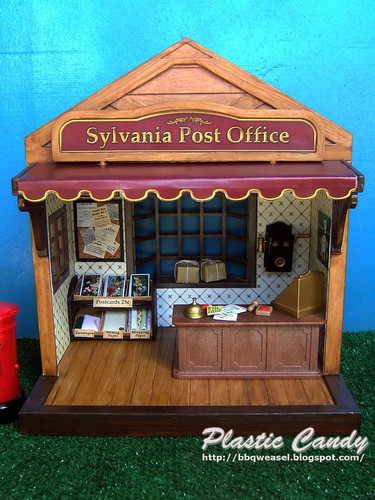
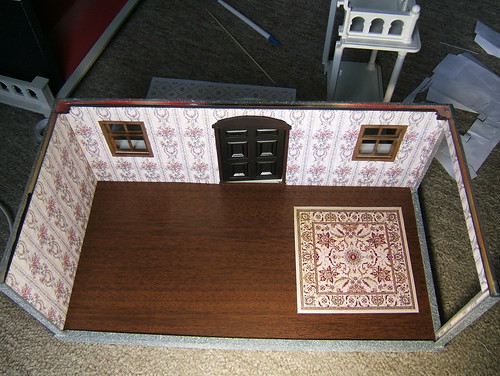
This is the thing that took ages for me to finish.

Post office goodies

It suffered from a combination of indecision and procrastination. I couldn't decide what to fill the shelves with or how to arrange things to look nice. I originally envisaged little baskets to hold the postcards, but my miniature basket making was fail. For a long time I just spread out the postcards overlapping each other on the top shelf. This thing from Rainy Blues saved me and helped me make that little tray. I encourage anyone who's interested in making little mini boxes and accessories to visit the site, it's awesome. I've got a few different sets of writing paper there too, but they're all hiding under the top sheet :P


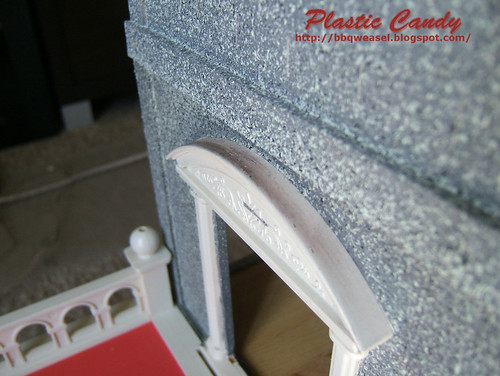
Nearly hidden on the right wall we have a poster. The original post office came with a couple of posters so I figure this one should have at least one too.

vintage poster

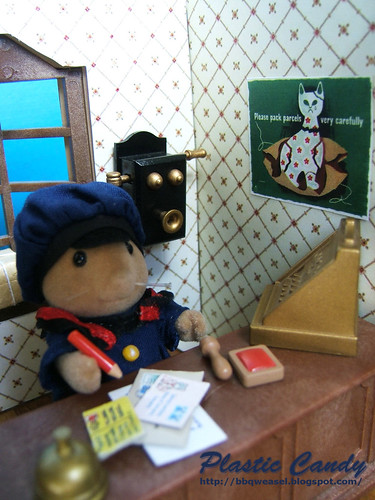
I love this poster! It's so cute. It's a printout of a real vintage post office poster. While I'm not sure it really fits the overall decor of the post office, I like it enough I don't care. Broken kitty is here to stay!

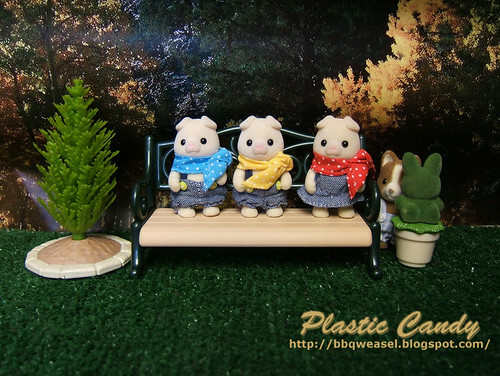
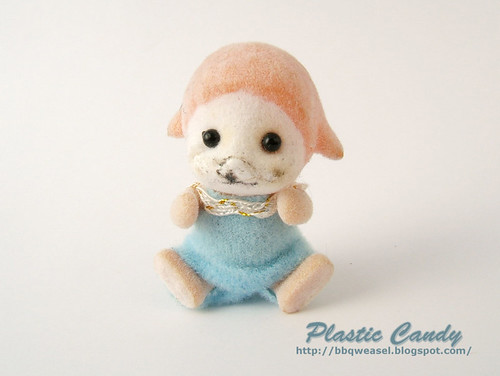
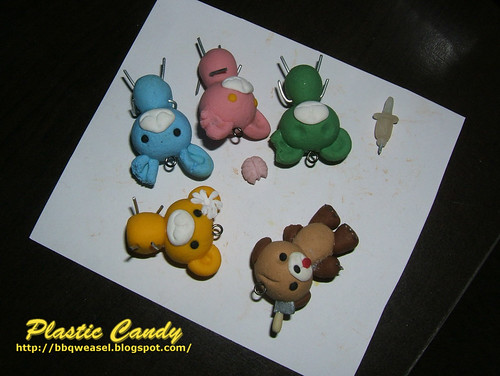
Now for the inhabitants of this little post office.

Postmaster Sam

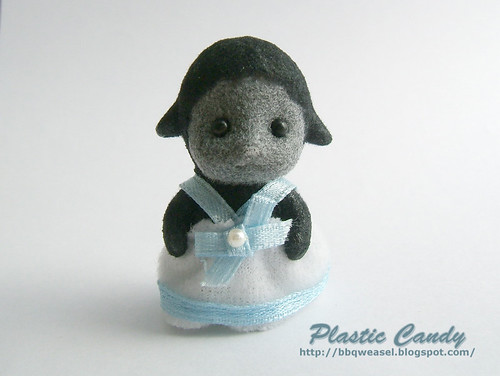
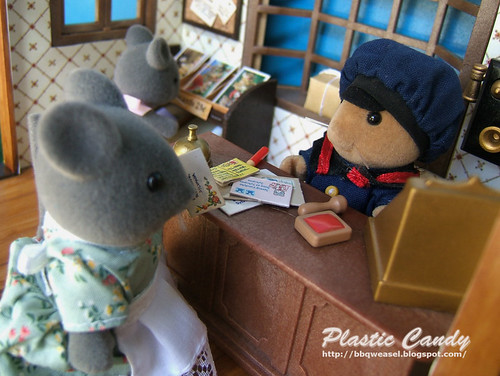
Samuel Stamp is the postmaster of this little post office. He stays indoors, doing important Postmastery things. It's nice and warm inside, out of all that rain, sleet and snow that Postman Pete has to bike through. On rainy days he likes to sit with a nice cup of hot chocolate and think of all the rain he's not out in.

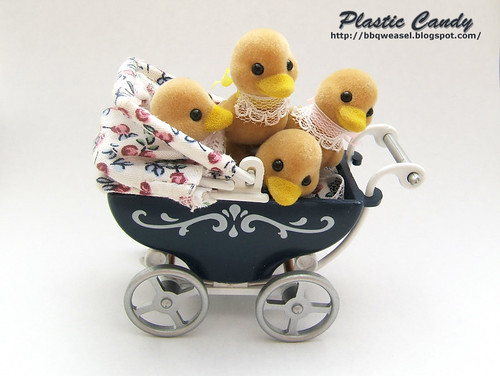
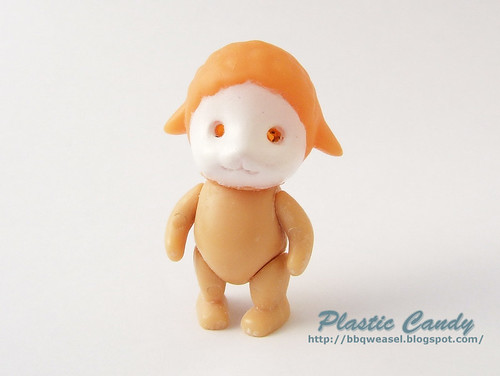
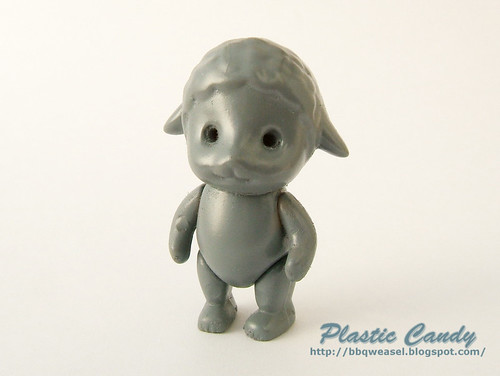
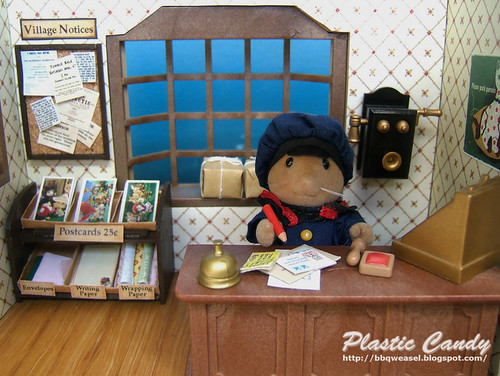
This is Postman Pete Petite.

Postman Pete

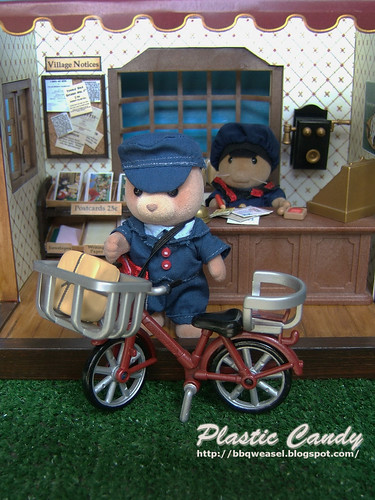
He delivers the mail on his trusty bike. Through rain, sleet or snow and braving hordes of angry dogs, he'll make sure that model of a five tentacled squid with hilarious tentacle movement action you bought on ebay gets to you. Or die trying. He's THAT dedicated guys. This postman is actually the JP version which doesn't come with a bike, unlike the UK version, so I repainted a Bobby Roberts bike I got in a lot. The parcel actually fits in the police bike basket, whereas the UK postman bike has a basket that's too small for the parcel the set comes with.

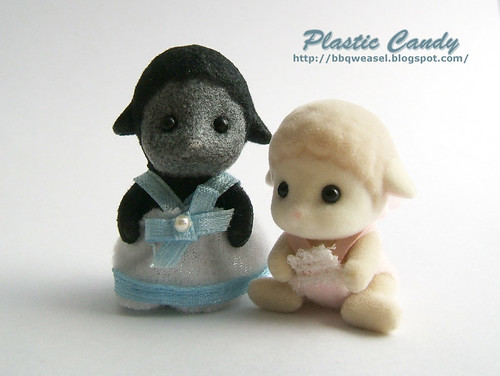
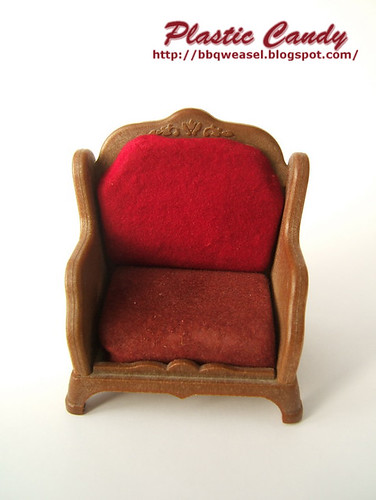
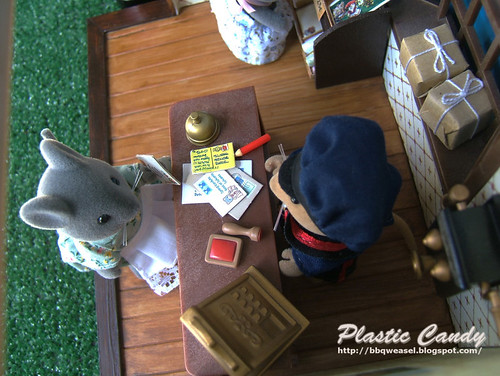
Time to take care of the customers.

Post office visit 1

Post office visit 2

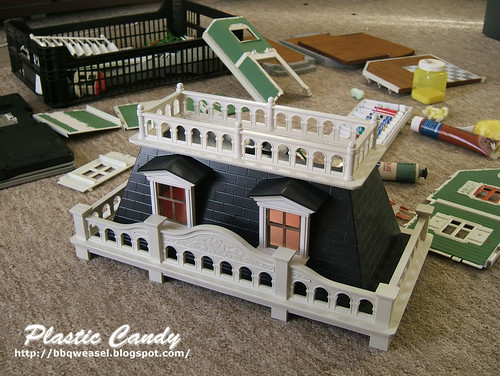
Anyway, this ends the post office update. Now I just need to finish all the other buildings I'm currently working on. Eeep.

I've also been working on some Valentine heart cookies. I'm hoping to get these to the dollhouse shop at Strathalbyn in time for them to sell. If I manage to finish on time this will be my first sale. Or trade. Because they have some stuff I'd be willing to trade for...


Valentine cookies wip

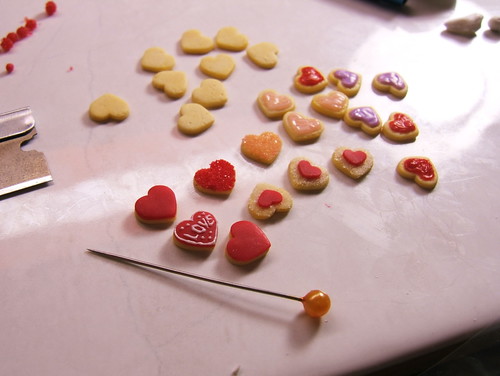
I love craft sand. It simulates sugar so well, and looks so good on the cookies IMHO. Craft sand proved to be a PIA to find online when I was looking. Everything was either huge bags for wedding decorations or cost more than I wanted to pay. Eventually I found a local seller who was selling sand art kits with included an assortment of tiny little bags of sand. Jackpot! The amounts of sand in those little bags were just the right amount I needed for small projects and will probably last me quite a while. I'm just sad there was no black sand in the set he gave me though.

This cookie project is also the first time I plucked up enough courage (yeah, I'm afraid of everything  so sometimes it takes me ages to try something because I feel so apprehensive of failure) to try using mini piping bags to do the piping work instead of using a pin like I had been doing before. The pin in the photo is just for scale this time! Anyway, I find using the piping bag easier than the pin. My biggest problem is shaky hands that make the piping work look lumpy and uneven. Practice, practice, practice!

Btw, after taking that picture I accidentally put my thumb on that cookie and messed it up.


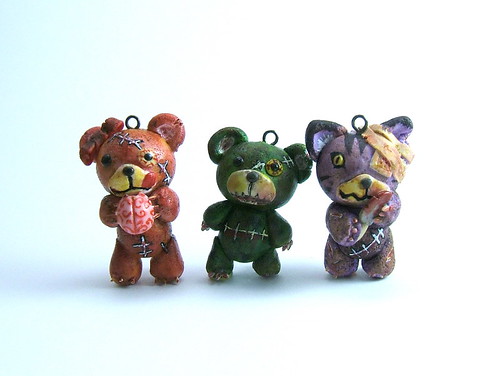
Horror game stuff ahead:

I've been playing a PSP visual novel type game called Corpse Party. It's a really good and very, very creepy game. Just looking at  it, you wouldn't think that it'd be capable of being creepy. It uses 2D sprites and backgrounds and anime style artwork. The creep factor is really in the great sound work (voice acting, sound effects) and the descriptions of various things a in the room your character is in. You can't really see most of what is described to you, but I think it enhances the horror factor by forcing you to use your imagination.

Photobucket

The general storyline goes like this: A group of students are telling ghost stories after school, and then decide to perform a ritual that will ensure their friendship for years to come. There is a sudden earthquake and they wake up in Heavenly Host Elementary, a school that had been destroyed years ago. Now they have to find a way out, and figure out why they are here.

Photobucket


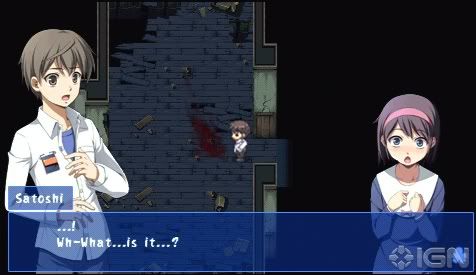
My description really doesn't do the game justice. All I recommend is picking this up and playing it through if you like horror and are prepared to do a lot of reading. Be warned though, this game is not about usual gameplay, but about atmosphere. Also, if you play this game, you must do so with a good set of headphones to get the full effect. The sound work is really integral to the mood of the game. Voices of the dead will speak to you from nowhere, sounding like they are right there in the same room as you, laughter and cries will flow from one side of your headphones to the other, like something invisible just passed you. Yeah, I'm not really good at this description thing. Anyway, I love this game and I'm about to start the last chapter.*hearts*