Showing posts with label miniatures. Show all posts

Sunday, 28 October 2018

Simple Candy Tutorial

It's been ages since I last posted on here. I'm mostly active on Instagram now, but I thought that for a tutorial, the good ole blogging format is best. Since it's very nearly Halloween, I'm going to share a very simple candy tutorial here.


Materials: All you need is some paper punches, shrink plastic and some sharpies/permanent markers.

I used 1 cm paper punches for the gummy bears in the picture. You can use larger punches; they'll just make larger sweets. As for the shrink plastic, you can buy sheets of shrink plastic, or you can look around in your recycling for some clear plastic packaging. All you need to do is make sure that you can see this symbol on it: 

The other types of plastic don't shrink. Once you have your materials, just punch out some shapes. If it gets too hard, punch some aluminium foil to sharpen your paper punches. 


Colour in both sides with your permanent marker.


And bake in the oven for about 3 or so minutes. I use a little toaster oven. I recommend keeping a close eye on the plastic as you are baking it and taking it out as soon as it stops warping and shrinking. Also, bake on a piece of baking paper. And ta-dah! You've now got some teensy tiny candy pieces, perfect to fill up your miniature trick or treat bags with.


Monday, 14 August 2017

More Mini Books

I'm currently making some books for Jona Wanders. It's a good way to get back into making miniature books again. I tend to spend too much time on one project and completely burn out on it for several months afterwards. I still need to fill up my Grand Mansion bookcase, stock my newsagent/bookseller and my library.

I wanted to make some Lord of the Rings books, and oddly enough, the best printable hardcover 'book covers' are from the extended DVD cases. I couldn't believe how hard it was to find nice, printable LotR covers! I also experimented with a pull out map. The version with the outline looks better, I think. I also learned that it was better to use coloured paper or cardstock rather than scrapbooking paper with one blank side. The white shows through. You'd think that would have been obvious to begin with. :P

First attempt:


Second attempt; a three book version with an outlined map


I needed to do coloured pages with lots of two page spreads for this lot, so I experimented with a different method of 'binding' the pages. My previous books were put together with glue and thread, so a bit more like how real books are bound. These are just folded and glued. It actually worked really well and open nicely.


The atlas is a mish mash of stuff from various sources. The insides were taken from a student 'World Atlas'.


Photoshoped a random book cover to make encyclopedia volumes. Makes for a nice little set with room to add more future volumes.


This is my personal favourite cover. I photoshopped the year out and added 'annual' so the book cna be used whenever. Not really sure what should be in an almanac, so I just took what I could find from the Old Farmer's Almanac website. I think I ended up with more articles about plants and cooking than actual weather and planting stats.


I find that adding that little bit of string on the spine to be the most fiddly bit. I think it makes the book more complete though, so I figure I should add it anyway. The books will need a sealer to protect the covers too, later. 

Saturday, 20 August 2016

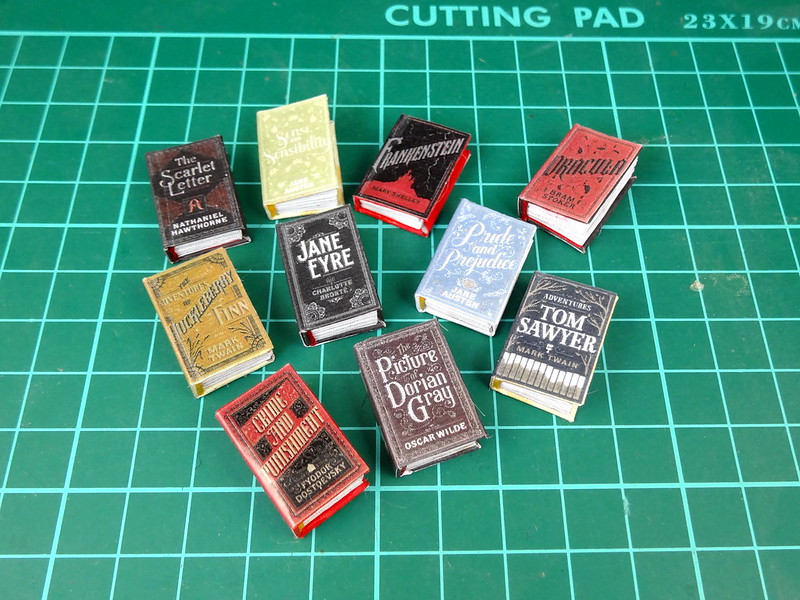
Miniature books

Mini books, first try I made these a month, or maybe a month and a half ago. My health has not been very good this year, so I haven't been doing as much as I used to (which isn't very much at all, really...).

I wanted to make books with pages you could turn with real text on it. Lots of research later, and these were born. I also needed to put a piece of sticky tape over the covers because I have a laser printer and the ink cracks when I fold the paper. The sticky tape trick works quite well, fortunately.

After I made this I realised that I wanted the spines to be curved rather than flat. That will be my next lot of books! No idea when I'll get around to doing them. I spent so much time making and remaking these and researching that I don't really want to go back to making tiny books for a little while. Plus I took a shitty picture which I really dislike.

Sunday, 26 October 2014

Pins and Needles Sewing Supplies Shop Update, plus other things

Long overdue update time! I actually completed this shop about a month ago, but didn't manage to take photos I was satisfied with until now.

Introducing the Pins and Needles sewing supplies store, your one stop shop for all your sewing needs. This shop contains craft books and magazines, thread, a nice selection of fabrics, paints, buttons, sewing machines etc.
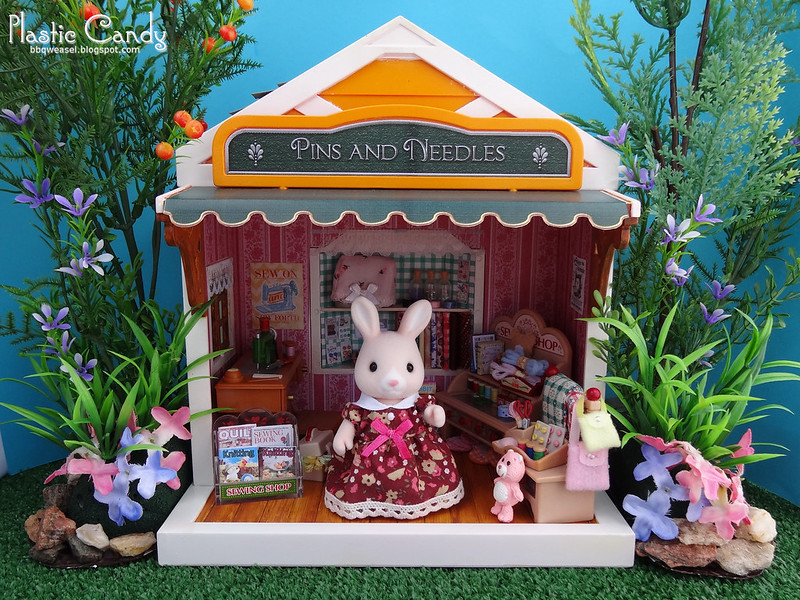
Pins and Needles Sewing Supplies


Meet Adrianne Hopkins, the proprietress of Pins and Needles.
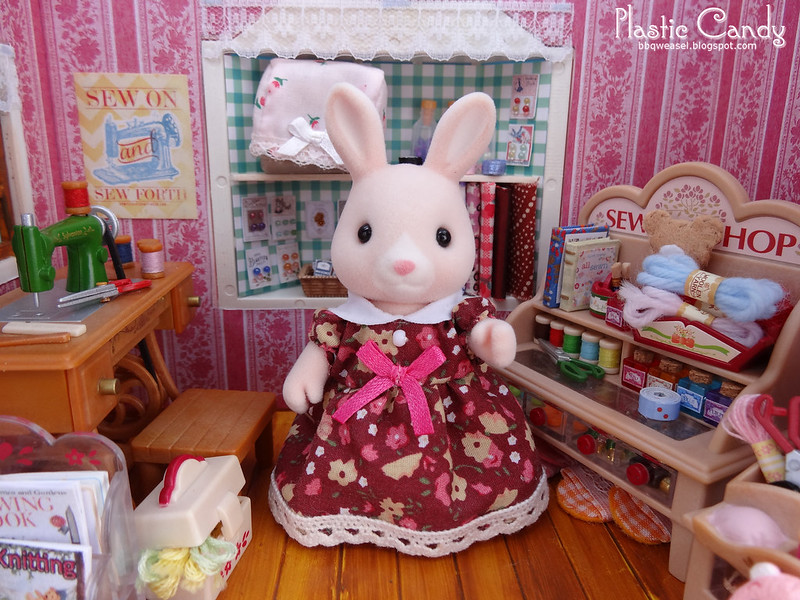
Adrianne Hopkins, Owner of Pins and Needles

I had originally considered either a Dandelion rabbit or Silk cat mother as the owner, but I thought that Adrianne and her colour scheme fit in there really well. I love the Hopkins Champagne rabbits. They are a soft pink colour and their flocking is so, so soft! I added a lace trim to her dress. Her original stock photos had a lace trim, but the final release came without (unfortunate, because she looks much fancier with some extra lace). I just glued it on because I suck at sewing.


Interior shot
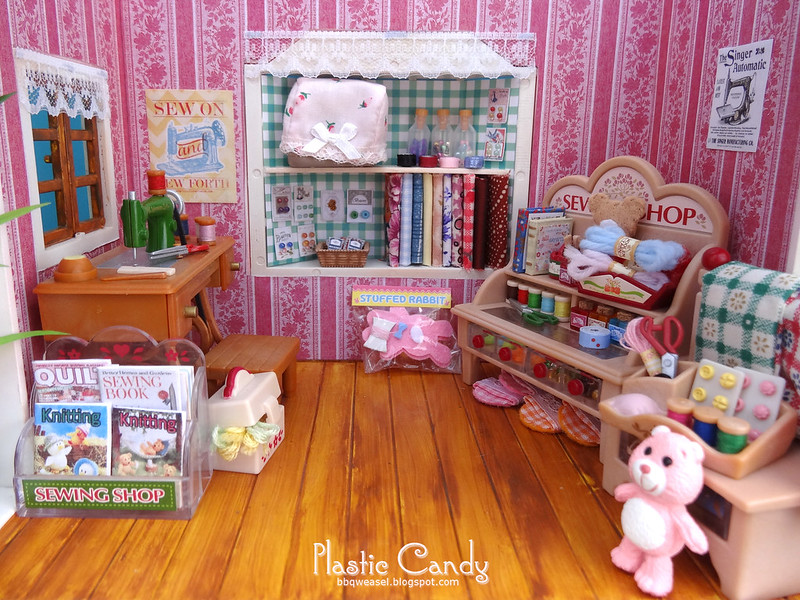
Sewing shop interior


Little Re-Ment Care Bear. I used to have him in Mulberry's Toy Store, but he just fits so well in here, I couldn't resist.
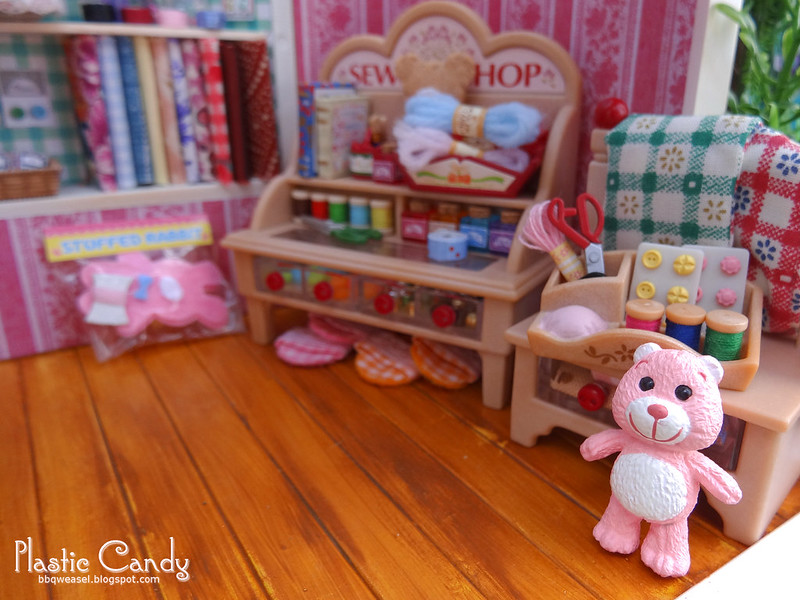
Little Care Bear


Goodies for sale. I did my best to make up for the missing bits in my sewing set and added extra items like the books and more beads. No way did the original set come with enough beads!
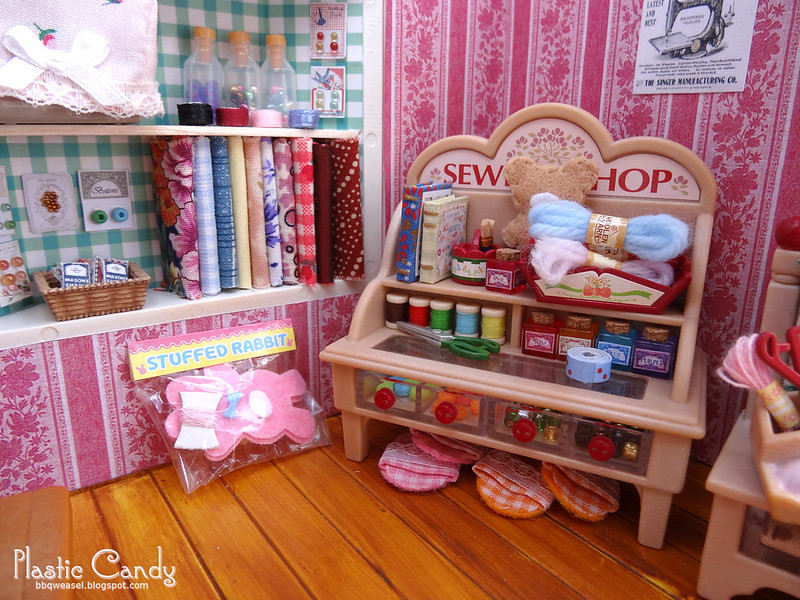
Sewing goodies closeup


Bay window turned into shelves. I don't think I really have enough fabric for a sewing shop, but it'll have to do. It's already pretty cramped in there.
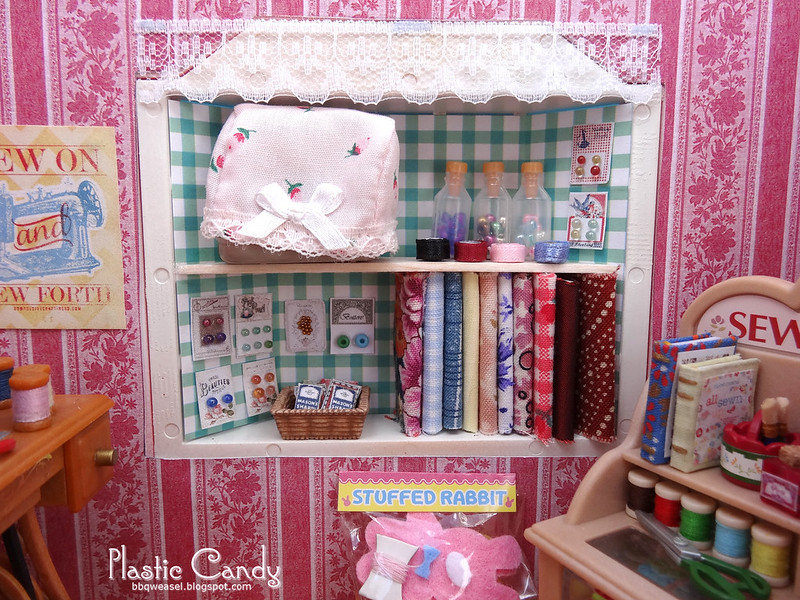
Stocked shelves


A green, vintage Singer, the pride of Pins and Needles. Not for sale, it's Adrianne's personal machine that she inherited from her mother.
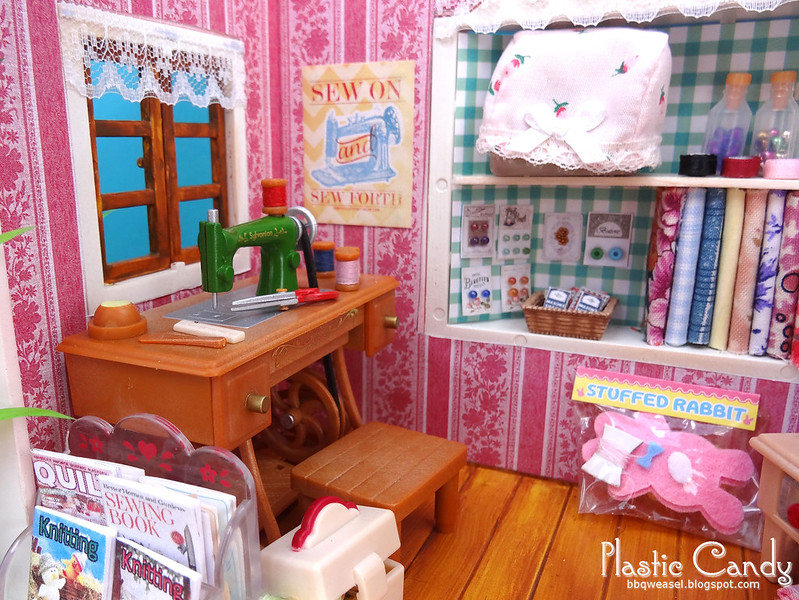
Vintage Singer

I love this piece. I kind of wish I had the black version too, but green's pretty good.


Sewing and knitting magazines.
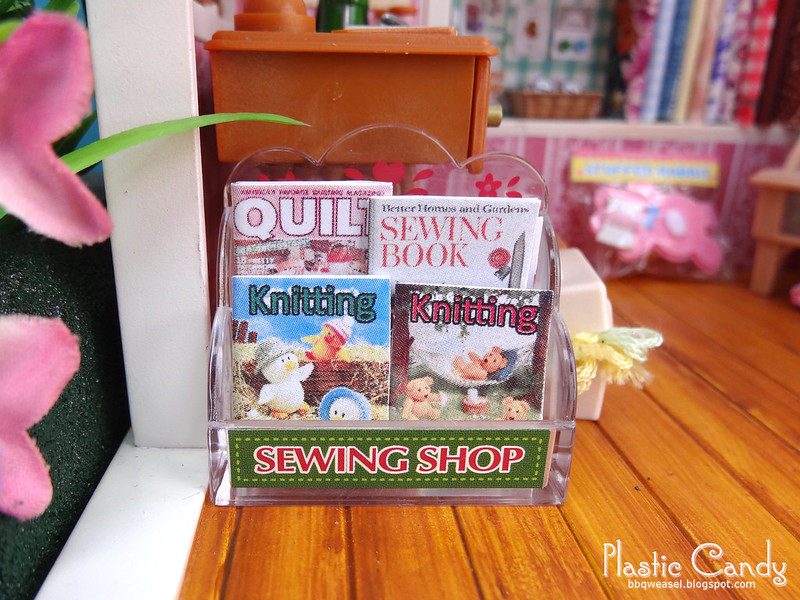
Craft magazines


Buy the bolt! I almost named Pins and Needles 'By the Bolt'. XD
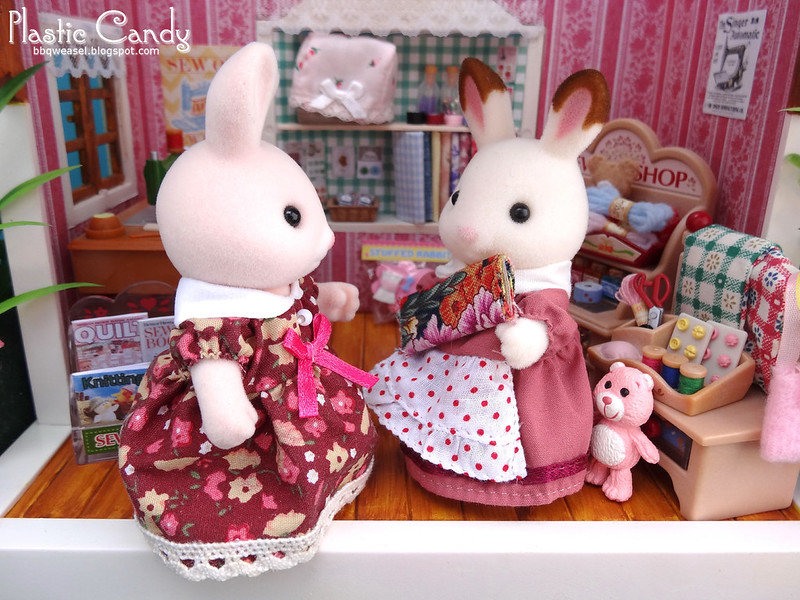
Buy the Bolt

And that's all for the shop. I might add some dress forms to the outside later, but hadn't really thought about it when I was taking the pictures. I also need to make better back drops and add more plants. The same two pieces of shrubbery is getting old.

---

I've done a review on this old Sylvanian school set on the forums here.

Also, I went to The Reject Shop last weekend and picked up this little guy.
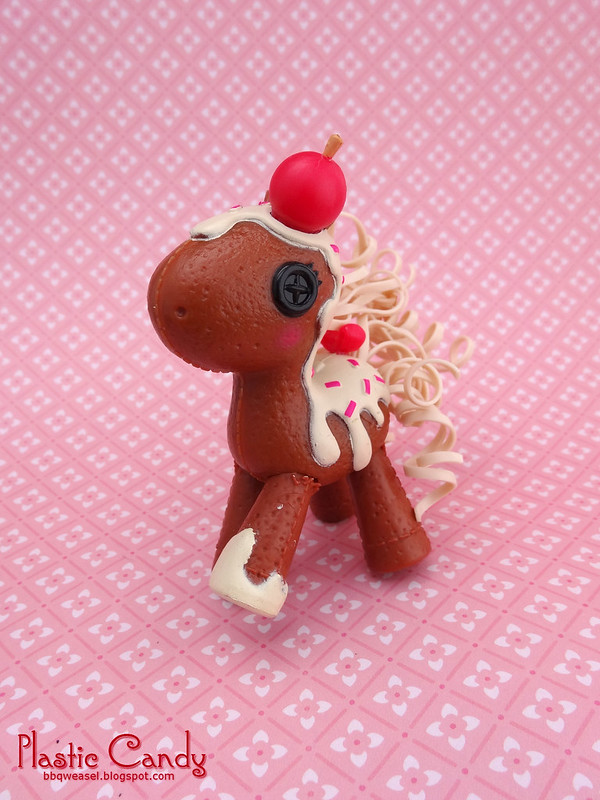
Candy Apple pony

Lalaloopsy candy pony! This one is called Mocha. I really, really wanted to like Waffles, because the concept of a unicorn with a smooshed ice cream cone on its head acting as its horn cracked me up. But Waffles has a really ugly bib molded on him. Just could not get over that silly bib. Mocha is really cute though.

Friday, 10 May 2013

Mini SF sets

I saw some of the mini SF sets on BeHappy and decided to pick up a couple of sets just for fun. I'm amazed by how much I absolutely freaking love them! Now I'm kicking myself for not getting the older mini sets when BeHappy had them ages ago. And also the Willow Hall mini I saw on ebay recently for a good price. The minis up there now are too expensive for me to justify, even if I do love them.

I've been disliking the pictures I've taken lately, but since I haven't uploaded anything for such a long time, I just thought 'screw it' and uploaded them all anyway.

Size comparison of a regular SF sister bunny figure and the mini Sylvanian choco bunnies.

Choco bunny playtime

I love her fuzzy paws! I like how cute they look, gripping the chair. While I do like the JP flat hands better, the cupped UK hands come in handy when I have stuff for them to hold.

Fuzzy paws

The mini Copper Beech Cottage. These kits come unassembled, so you have to put them together and apply the stickers yourself. I like doing that sort of thing. : ) I wish the cottage had a door.

Mini cottage

The inside has stickers for the kitchen and a few bits of furniture. Looks just like its full sized counterpart minus the stove. I like the look of the full size cottage but I don't think I have enough space for it. Not with all my other stuff...

Mini cottage inside

Miniature juice bar! One of the pictures I took had some flowers that were included in the set in it. The picture looked really weird, so I ended up removing them. The little basket that holds the jam jars in the original is too small in this set to actually do anything.

Mini juice stand


Not my favourite piece, but still cute. The mother rabbit has a lot of scratches on it, unfortunately. Came like that out of the package.

Mini ice cream stand

Couldn't resist a full frontal shot.

Mini ice cream stand 2


This bakery! I had so much fun assembling this bakery. It's so detailed and I think that the father Chocolate rabbit figure is the best one of the lot. He looks like he's standing instead of sitting. The wheel actually turns too.

Mini Watermill Bakery

This set comes with a number of loose bread items including three individual animal face breads, a croissant, a baguette, a loaf and a melon (I think) bread. There are so many pieces in this set, and the stickers are so detailed too. The inside window stickers actually depicts hills and grass.

Mini Watermill Bakery inside


One of the walls is actually different from the life-size version. Instead of having the water powered mixer, they have a number of shelves full of ingredients.

Mini Watermill Bakery inside 2

Ultimately, these sets give me much squee.

Monday, 26 September 2011

Finished bread, Sylvanian babies

I've finished the first round of bread for Okasaneko and myself.

Bread 2

We'll each get half of these.

Had enough bread yet?

These loaves would also look rather familiar to some. That's because I made similar ones a while back while I was experimenting. I really need to expand my range of bread, I don't want to be making the same ones over and over again.

More Bread
I do think the cuts on the short loaves are too deep, but nothing I can do about it now. At least this time I got the baguette scaled properly.

Bread

:P Still need to cover it with some matte varnish though. Next I'll make some melon pan turtles and look up some other types of bread to make, I don't think what I've done so far is nearly enough to fill the shelves. Plus the more variety the better!

I've also included some pics of a Sylvanian figurine next to the bread, and some in a bakery window.

Have some more bread.

The windows still look rather bare, so I need to make more goodies to fill it up!

Breeeead


Speaking of Sylvanians, I got this set a few weeks back, and it's one of the most adorable things ever!

Photobucket

It was also an excuse to get that three tier bunk bed, which has darker coloured bedding in this release (it has pastel tones in the regular release). I'm still not really sure where to put this set though. Maybe I should make a very simple little room out of styrofoam and wood for this? :P
 
I used my accumulated points on BeHappy's site to buy this, which meant that I ended up not having to pay for shipping. I probably would not have gotten it otherwise. I think at AUD36.49, BeHappy offers the best price for this set online. I've not seen cheaper anywhere else. On ebay it's available from various sellers from around AUD51 - 61, not including shipping (ouch).

Anyway, here's a pic of some adorable baby critters:
Tricycle Babies!


Friday, 15 July 2011

Orange treats and more resin updates

Mmm, orange treats for me!

Rosetti
: Ooo, the desserts Bronte is making for the book club meet. Well, she has her back turned and I'm sure she won't miss a teeny little bite!

Orange baking

Bronte: I can hear you.

I haven't taken photos of my toys for such a long time. It feel great to set up a scene and take pictures of my Sylvanians again! I thought I'd use some of the new things I'd made too.

Here's a clearer picture:

Orange goodies

I had been experimenting with orange canes so most of the things I've made recently have been orange themed. :P

The items in the top row are Valencian orange tarts, bottom left is an orange polenta cake drizzled with syrup and some kind of orange pudding.

I used resin for the syrup and it leaked down the cake and pudding enough to glue them to the tile I had. I managed to pull them off, luckily. Next time I'll try using gallery glass type paint. I'm not really pleased with the orange polenta cake, it looked far more pretty in my head!

Plates are Re-Ment and Megahouse.

Now, on to some resin updates:

The batch I was waiting for in the last update ended up being extremely disappointing. I did not mix the resin as thoroughly as it needed and my jam jars came out sticky and squishy. The top even came off of one when I was pulling it out of the mold. Also, some of the bottles came out deformed again.

Photobucket

I made up another batch and all save for one jar had some kind of major deformity. Ugh. Plus the colour was too light for strawberry jam.

Photobucket

This is the one perfect jar. Well, it looks lopsided in the picture, but it isn't, really.

Photobucket

I am slowly building up a nice collection of deformed jam jars.

DSCF1996

Wednesday, 6 April 2011

Project progress updates

I've been working on the cookies, and mushing up clay to make icing is hand killing work. I hope that the liquid clay will keep well in the small ziploc bags I'm using to store them. I don't really want to have to squish up new clay every time I want some icing. I think I watched an entire episode of Midsomer Murders while making brown icing.

Icing cookies

I'm currently using sticky tape to hold down the cookies. It's much easier to work on them now--they were hard to hold down with my fingernails (I did that when I was brushing chalk pastel onto them).

I'm having a few problems with my clay, it seems to bubble when I bake them so my icing ends up a little lumpy. Asking at the CDHM forums seem to indicate it may be the result of the brand of clay I'm using? Oh well, it's not really noticeable, especially after the designs are put on so I'm just going to continue with the Ozzle + Fimo mix I'm currently using.

I also need to clean up that star. I was trying to make curly designs like on that butter fly, but couldn't make it and changed halfway to slightly curved lines meeting in the middle instead, hence the smudges.


Mooshed bear

Today, I iced some chocolate covered teddy bear cookies. I put them in a little container and put that into my bag to take home to bake, since I didn't have an oven where I was. Somehow the bag got put on its side and the poor teddy ended up getting mooshed against the container lol. One got stuck upside down on the back of the one in front. At least it'll be easy to clean the design off and start again.


Post office progress

Also, I'm making progress with my Sylvanian post office! I wanted a little building that was brown and had some wood-like texture to it. I love the wallpaper, it looks perfect for the post office! Not too strong a design with an overall creamy colour. I just wish it had been offered at a higher resolution though, you can see the pixelation if you look up close.

Now I'm working on the roof shingles, redesigning the sign and the awning. After that I'm thinking of a little shelf or table where things like writing paper and postcards can be put for sale, a village bulletin board and a letter sorting shelf. I'm also considering moving a set of scales to the window where the packages are. I'm also thinking that I should gloss up the floors more, because floorboards are ususally glossy, right? :p and maybe even the rest of the building itself.